Adaptive Cruise Control (ACC) is one of the most desirable driver assistance features available on modern Jaguar and Land Rover vehicles. Unlike conventional cruise control, which maintains a fixed speed, ACC uses radar and camera sensors to detect the vehicle ahead and automatically adjust speed to maintain a safe following distance. For many JLR owners, ACC is present in the hardware but deactivated in the software configuration, making it an ideal candidate for professional coding activation. This guide explains which JLR models support ACC, what hardware is required, and how to enable it using JLR SDD or Pathfinder.
What Is Adaptive Cruise Control?
Adaptive Cruise Control is an advanced driver assistance system (ADAS) that combines traditional cruise control with forward-facing sensors to monitor traffic conditions. The system automatically accelerates, decelerates, and in some cases, brings the vehicle to a complete stop based on the behaviour of the vehicle in front.
On JLR vehicles, ACC operates through a combination of a millimetre-wave radar sensor and a forward-facing camera module. The radar sensor is typically mounted behind the front grille or bumper and is responsible for detecting the distance and relative speed of vehicles ahead. The camera module, mounted on the windscreen near the rear-view mirror, provides lane recognition and object classification, helping the system distinguish between cars, lorries, and stationary objects.
Many JLR vehicles are built with the physical hardware for ACC but are sold without the feature enabled, particularly in lower trim levels or fleet configurations. This is because it is often more cost-effective for the factory to install a single hardware specification across all vehicles and deactivate features via software than to maintain multiple hardware configurations. This practice creates an opportunity for owners to unlock the functionality they already own.
Which JLR Models Support ACC Activation?
ACC activation is possible on a wide range of Jaguar and Land Rover platforms, but it depends on the presence of the correct hardware. The following table lists the most commonly requested models and their ACC compatibility status.
| Vehicle | Platform Code | Model Years | Hardware Required | Activation Status |
|---|---|---|---|---|
| Land Rover Defender | L663 | 2020 onwards | Radar + camera | Supported |
| Land Rover Discovery Sport | L550 | 2015 onwards | Radar + camera | Supported |
| Range Rover Evoque | L551 | 2019 onwards | Radar + camera | Supported |
| Range Rover Velar | L560 | 2017 onwards | Radar + camera | Supported |
| Jaguar XF | X260 | 2016 onwards | Radar + camera | Supported |
| Jaguar F-Pace | X590 | 2016 onwards | Radar + camera | Supported |
| Range Rover Sport | L494 | 2014 onwards | Radar + camera | Supported |
| Range Rover | L405 | 2013 onwards | Radar + camera | Supported |
| Land Rover Discovery | L462 | 2017 onwards | Radar + camera | Supported |
It is important to note that support does not mean guarantee. Every vehicle must be inspected to confirm the radar and camera modules are physically present and functioning. Some base-specification vehicles were built without the radar sensor, particularly early L550 Discovery Sport models and certain fleet-specification X260 XF saloons. A pre-activation diagnostic scan is essential to verify hardware presence.
Hardware Requirements for ACC
Before attempting to activate ACC, you must confirm the following hardware is installed and operational:
- Forward Radar Sensor: Usually a Bosch or Continental MRR (Mid-Range Radar) or LRR (Long-Range Radar) unit mounted behind the front grille or within the front bumper. The radar must be clean, properly aligned, and free of diagnostic fault codes.
- Forward-Facing Camera: A mono or stereo camera mounted on the windscreen, typically near the rear-view mirror. This camera is shared with the lane-keeping assist and traffic sign recognition systems. It must be calibrated correctly and free of obstruction.
- Brake System: The vehicle must be equipped with an electronically controlled brake system that can receive deceleration commands from the ADAS module. Most JLR vehicles built from 2015 onwards have this capability.
- Electronic Power Steering: Required for systems that include lane-keeping assist or lane-centring functions integrated with ACC. The steering module must communicate correctly with the ADAS control unit.
- ADAS Control Module: The central processing unit that interprets radar and camera data and issues commands to the engine, brake, and steering systems. On most JLR platforms, this is integrated within the BCM or a dedicated ADAS module.
If any of these components are missing or damaged, ACC cannot be activated through software alone. In such cases, the missing hardware must be installed and calibrated before the software configuration can be updated.
Software Activation Process
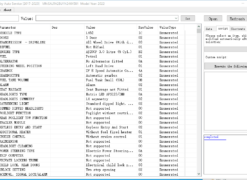
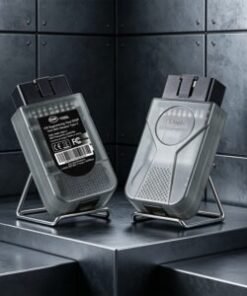
ACC activation is performed by modifying the Vehicle Configuration Code (CCF) to tell the vehicle that the hardware is present and the feature should be enabled. This is done through JLR SDD (for vehicles up to 2016) or JLR Pathfinder (for 2017 onwards). Both platforms require an authorised licence and a J2534-compatible VCI.
The procedure is not simply a matter of toggling a single switch. The CCF contains interrelated parameters that must be updated consistently. For example, enabling ACC may also require enabling the forward collision warning, emergency braking, and following distance indicator parameters, depending on the platform and software version. An incomplete or inconsistent CCF can generate DTCs and warning messages.
Step-by-Step Activation Guide
The following procedure outlines the correct workflow for ACC activation. Variations exist between platforms, but the core principles remain consistent across the JLR range.
Step 1: Verify Hardware Presence
Connect your diagnostic equipment and perform a full vehicle scan. Read the DTCs from the radar sensor, camera module, and ADAS control module. If any hardware-related DTCs are present (e.g., communication faults, calibration errors, or internal faults), resolve these before proceeding. Check the CCF to see whether the radar and camera are already flagged as "present" in the build configuration. If they are flagged as "not present" but the hardware is physically installed, the vehicle is a prime candidate for activation.
Step 2: Connect Diagnostic Equipment
Connect the J2534 VCI to the OBD-II port and the laptop. Launch SDD or Pathfinder and identify the vehicle using the VIN. Ensure the vehicle battery is fully charged and connected to a stabilised battery charger. The laptop must be on mains power with sleep mode disabled.
Step 3: Access the CCF Configuration
Navigate to the Vehicle Configuration menu. Locate the driver assistance or ADAS parameters. On most platforms, the relevant fields are named Cruise Control Type, Adaptive Cruise Control, or ACC Present. The exact location varies by platform and software version but is typically found under the Body, Chassis, or Driver Assistance top-level category.
Step 4: Enable Adaptive Cruise Control
Change the cruise control type from "Standard" or "Not Present" to "Adaptive Cruise Control" or "ACC." Depending on the platform, you may also need to enable associated features such as Queue Assist, Stop & Go, Intelligent Emergency Braking, or Forward Collision Warning. Enable these only if the supporting hardware is confirmed present. Enabling features without the corresponding hardware will generate DTCs and may cause warning messages to persist on the instrument cluster.
Step 5: Write the Updated CCF
Write the modified CCF to the vehicle. The write process can take 10 to 20 minutes. During this time, multiple modules will be reprogrammed and rebooted. Do not interrupt the process, disconnect the VCI, or power down the vehicle. If the write fails partway through, the vehicle may enter a limp-home mode or display warning messages. In such cases, re-read the CCF from the vehicle and attempt the write again after verifying battery voltage and cable connections.
Step 6: Calibrate Sensors and Validate
After the CCF write is complete, the radar and camera modules may require calibration. Pathfinder will prompt you if calibration is necessary. Radar calibration typically requires the vehicle to be driven on a straight road at a steady speed between 50 and 80 mph for a period of 5 to 10 minutes. Camera calibration may require a static calibration target in a controlled environment, or dynamic calibration via a similar driving procedure. Follow the on-screen instructions precisely. Once calibration is complete, perform a road test to verify ACC operation. Activate the system via the steering wheel controls and confirm that the vehicle accelerates, decelerates, and maintains a following distance correctly.
Common Error Codes and Their Meanings
During or after ACC activation, you may encounter diagnostic trouble codes. The following table explains the most common codes and how to resolve them.
| DTC Code | Description | Cause | Solution |
|---|---|---|---|
U0100-87 |
Lost communication with ECM | Network interruption during CCF write | Cycle ignition, clear DTCs, and re-perform the CCF write. |
B12A2-31 |
Radar sensor not calibrated | CCF changed but radar calibration not performed | Perform dynamic radar calibration via Pathfinder or drive the vehicle at the required speed. |
B11D5-31 |
Camera system not calibrated | Windscreen camera requires calibration after CCF change | Perform static camera calibration using a target board, or dynamic calibration if supported. |
C0051-62 |
Steering angle sensor not calibrated | Steering angle sensor requires reset after module changes | Run the steering angle sensor calibration routine in the diagnostic software. |
U0415-68 |
Invalid data received from ADAS module | Inconsistent CCF parameters | Re-read the CCF, verify all ADAS parameters are consistent, and rewrite the configuration. |
B1A01-31 |
Radar sensor obstructed | Physical blockage or contamination | Clean the radar sensor and the area behind the front grille. Remove any aftermarket accessories that may block the sensor field of view. |
Vehicle-Specific Notes
Each JLR platform has unique characteristics that affect ACC activation. The following notes summarise the key considerations for the most popular models.
Land Rover Defender L663
The L663 uses a combined radar and camera architecture that is tightly integrated with the Pivi Pro infotainment system. ACC activation requires Pathfinder and a current software subscription. The L663 also supports Queue Assist and Stop & Go functionality, which can be enabled alongside ACC if the vehicle is equipped with the appropriate radar module. Some early L663 vehicles shipped without the radar sensor; these cannot have ACC activated without hardware retrofit.
Land Rover Discovery Sport L550
The L550 Discovery Sport uses a slightly older ADAS architecture that communicates over the medium-speed CAN bus. ACC activation is possible on vehicles built from late 2016 onwards that include the optional driver assistance pack. Earlier vehicles without the forward camera module cannot support ACC. The radar sensor on the L550 is mounted behind the front grille badge; if the badge has been replaced with an aftermarket item, the radar may be obstructed.
Range Rover Evoque L551
The second-generation Evoque (L551) shares its ADAS platform with the Discovery Sport L550. ACC activation is straightforward on vehicles with the correct hardware. The L551 introduced a new windshield-mounted tri-camera module that also supports traffic sign recognition and adaptive headlight control. All three camera functions must be calibrated together if the windshield is replaced or the camera module is disturbed.
Range Rover Velar L560
The Velar uses a higher-specification radar sensor capable of supporting High-Speed Emergency Braking and Blind Spot Assist. ACC activation on the L560 is often bundled with these features because they share the same hardware. If the vehicle was built with the radar but without the camera, ACC can still be activated, but lane-keeping and traffic sign recognition will not be available.
Jaguar XF X260
The X260 XF requires SDD for model years 2016 to 2017 and Pathfinder for 2018 onwards. ACC activation on this platform is well-documented and reliable, provided the radar and camera are present. Some fleet-specification XF models were built with the radar but not the camera, which limits the system to radar-only ACC without lane-keeping functionality.
Jaguar F-Pace X590
The F-Pace shares the same iQ platform as the X260 and uses an identical ADAS architecture. ACC is commonly deactivated on lower trim levels. Activation is straightforward and typically includes the full suite of driver assistance features, including Forward Collision Warning and Intelligent Emergency Braking.
When Professional Installation Is Needed
While ACC activation is technically a software procedure, it is not always suitable for DIY execution. We recommend professional assistance in the following scenarios:
- Hardware retrofit required: If the vehicle is missing the radar sensor, camera module, or ADAS control unit, a professional installer can source the correct parts, fit them, and perform the full calibration sequence.
- Windscreen replacement: If the camera requires calibration and the windscreen has been replaced, the camera mounting bracket must be positioned precisely. This often requires a static calibration rig that is not available to home users.
- Post-accident repairs: If the vehicle has been involved in a collision, the radar sensor may have shifted in its mounting bracket, or the camera alignment may have been disturbed. A professional can verify structural alignment before attempting sensor calibration.
- Complex CCF edits: If the vehicle has a non-standard CCF (e.g., an import, a modified vehicle, or a fleet special order), the activation procedure may require additional parameter changes that are not documented in standard guides.
SX-CAN offers a professional ACC activation service that includes a full hardware inspection, CCF modification, sensor calibration, and road test validation. Our technicians can also perform the work remotely if you have the necessary diagnostic interface and a stable internet connection. The service is priced at £149 and includes a 12-month warranty on the activation.
Conclusion
Adaptive Cruise Control is a genuinely useful upgrade that enhances safety and reduces driver fatigue on long journeys. Because many JLR vehicles are built with the necessary hardware but sold without the feature enabled, ACC activation represents one of the best-value software upgrades available to owners. By following the steps in this guide and verifying hardware presence before making any changes, you can unlock a feature that transforms the driving experience.
If you are unsure whether your vehicle is compatible, contact the SX-CAN team with your VIN. We can confirm hardware presence, advise on the correct activation procedure, and provide a fixed-price quotation for professional installation. For more JLR technical guides, explore our articles on KVM and BCM programming and 007 Splash Screen activation, or browse our full range of diagnostic tools and coding services.