The Body Control Module (BCM) is one of the most critical and complex modules in any Jaguar Land Rover vehicle built during the SDD era. It coordinates dozens of comfort, convenience, and safety functions, and when it fails or needs replacement, correct programming is essential to restore normal operation. This guide covers everything you need to know about JLR SDD BCM programming, from understanding what the BCM does to safely virginising and coding replacement modules.
What Is the Body Control Module?
The Body Control Module is an electronic control unit that manages the body-related functions of the vehicle. Unlike the engine or transmission control modules, which focus on powertrain operation, the BCM handles the systems that affect day-to-day usability and comfort. On Jaguar Land Rover vehicles, the BCM is deeply integrated into the CAN network and communicates with many other modules to coordinate behaviour.
Typical functions managed by the BCM include central locking and unlock logic, interior and exterior lighting control, power window operation, windscreen wiper and washer timing, alarm system integration, immobiliser communication, and various convenience features such as approach lighting and auto-dimming. The BCM also handles some logic related to trailer connections on vehicles equipped with tow bar electrics.
Because the BCM touches so many systems, a fault or misconfiguration can produce a wide range of symptoms that appear unrelated at first glance. A single BCM issue can cause warning lights, non-functioning windows, erratic locking behaviour, and lighting problems simultaneously. This is why accurate diagnosis and correct programming are so important.
What Does BCM Programming Do with JLR SDD?
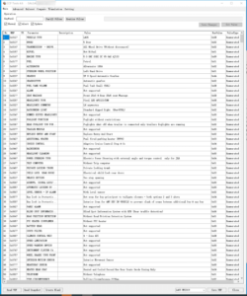
JLR SDD BCM programming allows a technician to interact with the BCM at several levels. The most common use is to read and clear diagnostic trouble codes from the BCM. When the BCM detects a fault in one of its monitored circuits, it stores a code that can be retrieved through SDD. These codes often point to specific wiring, actuator, or sensor issues that can be repaired without replacing the module itself.
Beyond simple code reading, SDD can programme the BCM configuration data. This is necessary when the BCM needs to learn the vehicle's specific equipment level. For example, a vehicle with a sunroof and memory seats has a different BCM configuration from a base model without these features. If a replacement BCM is installed without the correct configuration, features may be missing or may behave incorrectly.
SDD can also perform BCM virginising, which is the process of erasing a used BCM to a blank state so it can be programmed to a new vehicle. This is essential when sourcing second-hand BCM modules, as a BCM that is still married to a donor vehicle cannot be accepted by the recipient vehicle's security system. Virginising wipes the module's memory and allows fresh programming.
Finally, SDD supports calibration and adaptation functions for the BCM. These include procedures such as window express-up calibration, rain sensor sensitivity adjustment, and central locking behaviour configuration. These adaptations allow technicians to fine-tune the vehicle's behaviour to match customer preferences or correct drift that has occurred over time.
Common BCM Codes and What They Mean
Understanding BCM diagnostic trouble codes helps you determine whether the issue is a simple wiring fault, a failed actuator, or a deeper module problem. Here are the most common BCM codes encountered in JLR SDD.
B1B00 indicates a central locking system fault. This can be caused by a failed door latch actuator, a broken wiring harness in the door hinge, or a communication fault between the BCM and the door module. Always check the physical actuator before condemning the BCM.
B1B01 points to a door latch malfunction. On Range Rover L322 and Discovery 3 models, the door latches are a known weak point. The microswitches inside the latch fail, causing the BCM to receive inconsistent signals. Replacing the latch usually resolves this code.
B1B02 is a lighting circuit error. This often occurs when an aftermarket bulb with incorrect resistance is installed, or when a LED upgrade is fitted without proper load resistors. The BCM monitors circuit current, and deviations trigger this fault.
B1B03 indicates a wiper motor control fault. The BCM sends PWM signals to the wiper motor, and if the motor draws too much current or fails to reach its park position, this code is set. Check the wiper linkage and motor before suspecting the BCM.
B1B04 is a window lift module error. This typically points to a failed window regulator motor or a broken cable. The BCM communicates with the door module, which controls the window motor directly.
U0010 is a CAN bus communication error. This is a serious code that indicates the BCM is having trouble talking to other modules on the network. Causes include poor power or ground connections, a failing BCM, or a short in the CAN wiring.
The BCM Virginising Process
Virginising is the process of resetting a BCM to a factory-blank state so it can be programmed to a new vehicle. This is a common requirement when fitting a used BCM, as Jaguar Land Rover modules are typically locked to the vehicle in which they were originally installed.
The virginising process varies by vehicle model and BCM type, but the general principle is consistent. The technician connects to the vehicle using JLR SDD and a J2534 interface, navigates to the BCM programming section, and selects the virginising option. SDD then sends a command to the BCM that erases its stored VIN, configuration data, and security keys. The module is then in a blank state and ready for fresh programming.
It is important to note that not all BCMs can be virginised. Some later modules have one-time programmable memory that cannot be erased once configured. Additionally, some security-related BCM functions require online authorisation through TOPIX Cloud, even for virginising. If you are unsure whether a specific BCM can be virginised, contact our remote support team before purchasing a used module.
After virginising, the BCM must be programmed with the correct vehicle configuration data. This includes the VIN, the equipment level, the regional settings, and any optional features. Skipping this step will result in a partially functional vehicle with missing features or warning lights.
Step-by-Step BCM Programming with SDD
Follow this procedure carefully for safe and successful BCM programming using JLR SDD. Each step is important, and skipping any stage increases the risk of errors.
Step 1: Prepare the Vehicle and Equipment
Connect a battery maintainer to the vehicle and verify it is holding stable voltage. Connect your J2534 VCI interface to the OBD-II port and to your laptop. Launch JLR SDD and allow the application to fully initialise. Ensure the vehicle ignition is in the correct position as specified by SDD for the procedure you are about to perform.
Step 2: Identify the Vehicle
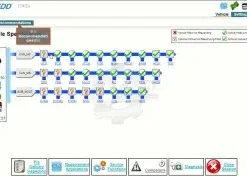
Read the vehicle VIN through the VCI interface or enter it manually. Confirm that SDD correctly identifies the model, year, and specification. If the vehicle is modified from factory specification, make a note of the current configuration before making any changes.
Step 3: Read the Existing BCM Data
Before programming, read the current BCM configuration and DTC status. Save this information if possible. If you are programming a replacement BCM, this data helps you verify that the new configuration matches the original. If you are modifying an existing BCM, this baseline helps you understand what has changed.
Step 4: Virginise the BCM (if required)
If you are installing a used or replacement BCM, virginise it first following the SDD guided procedure. Ensure the process completes successfully before proceeding. If virginising fails, do not continue with programming. Troubleshoot the connection and try again, or contact support.
Step 5: Programme the Configuration
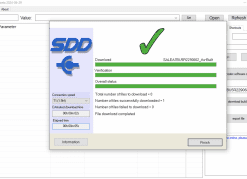
Select the correct BCM configuration for the vehicle. SDD will present options based on the vehicle identification data. Choose the appropriate equipment level, regional variant, and optional features. Confirm the selection and initiate the programming session. Monitor the progress bar and do not interrupt the process.
Step 6: Verify and Test
After programming completes, run a full network scan to verify that all modules are communicating correctly. Clear any transient DTCs that appeared during the session. Test all BCM-controlled functions: central locking, interior lights, exterior lights, windows, wipers, and alarm operation. Address any faults before returning the vehicle to the customer.
Safety Considerations
BCM programming is a powerful procedure, but it carries risks if not performed correctly. The following safety considerations should be observed every time.
Always use a battery maintainer. Voltage drops during programming can corrupt the BCM or other modules. A stable 14-volt supply is essential. Never rely on the vehicle battery alone, especially if it is more than a few years old.
Never interrupt a programming session. Once SDD begins writing data to the BCM, the process must complete uninterrupted. Disconnecting the VCI, turning off the ignition, or allowing the laptop to sleep can leave the module in an unrecoverable state. Ensure your laptop is connected to mains power and configured to prevent sleep.
Double-check the configuration before programming. Writing the wrong configuration data to a BCM can disable features or cause incorrect behaviour. Always verify that the selected configuration matches the vehicle's actual equipment level. If you are unsure, consult the vehicle build sheet or contact our support team.
Back up original data where possible. While SDD does not always provide a direct backup function for BCM data, recording the original DTC list and configuration settings before making changes gives you a reference point if something goes wrong.
Work in a clean environment. Static electricity and moisture can damage electronic modules. Handle BCM modules with appropriate anti-static precautions, and avoid working in damp conditions.
Vehicle-Specific Notes
Different JLR models have variations in BCM architecture and programming behaviour. Here are the most important model-specific considerations.
Range Rover L322 (2005-2012): The BCM on early L322 models is relatively straightforward to programme, but it is sensitive to low voltage. Always use a high-quality battery maintainer. The central locking latch actuators are a common failure point and often produce BCM codes that appear to be module faults.
Discovery 3 and 4 (L319): These vehicles have a complex CAN network with multiple BCM-related modules. The Discovery 4 in particular has a more sophisticated body electronics architecture that requires careful attention to configuration data. After BCM programming, a full network reset is often required.
Range Rover Evoque (L538): The Evoque BCM is more tightly integrated with the immobiliser system. Some BCM programming functions on this model require online authorisation, and virginising is not always possible on later production modules. Check module compatibility before attempting programming.
Jaguar XF (X250): The XF uses a BCM that controls a large number of convenience features. Configuration errors on this model are particularly noticeable because the customer interacts with BCM functions constantly. Pay special attention to the memory seat and mirror settings during programming.
Conclusion
JLR SDD BCM programming is an essential skill for any workshop servicing Jaguar Land Rover vehicles from 2005 to 2016. Whether you are replacing a failed BCM, virginising a used module, or adjusting configuration settings, the correct procedure ensures the vehicle's body electronics function as intended. Understanding the common BCM codes, the virginising process, and the safety considerations helps you avoid costly mistakes and deliver reliable results to your customers.
At SX-CAN, we provide the tools and support you need for confident BCM programming. Our JLR SDD Jaguar Land Rover Diagnostic includes the latest calibration files, our Jaguar Landrover VCI interface for SDD ensure stable communication, and our remote programming service gives you expert assistance when you need it. Whether you are learning BCM programming for the first time or troubleshooting a difficult case, our JLR-trained engineers are here to help.