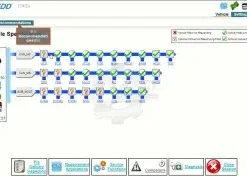
Installing JLR SDD (Symptom Driven Diagnostics) for the first time can seem daunting, especially if you are unfamiliar with legacy Java-based automotive software. The process involves multiple stages: downloading the correct software package, verifying your hardware meets the minimum specifications, installing Windows dependencies, running the main installer, configuring J2534 device drivers, activating your licence, and finally verifying that everything communicates correctly with your vehicle. This guide takes you through each stage methodically, with troubleshooting tips for the most common errors we encounter when supporting customers through our remote installation service.
Where to Download JLR SDD Software
The first and most important question is where to obtain the SDD software package. JLR SDD is not publicly available as a free download from Jaguar Land Rover. The software is distributed through authorised diagnostic tool suppliers and specialist resellers who hold the appropriate licences to redistribute the installation media. At SX-CAN, we provide a JLR SDD Jaguar Land Rover Diagnostic that includes the main application, all necessary calibration files, the NGI (New Generation Infotainment) update pack, and comprehensive documentation.
When evaluating suppliers, be cautious of unusually low prices or downloads from unverified forums. Corrupted installers, outdated versions, and missing calibration files are common problems with unofficial sources. A legitimate SDD package should include the following components: the SDD application installer (typically version 157.00 or later), the JRE (Java Runtime Environment) bundle, the NGI calibration library, driver packs for common VCI devices, and a licence activation utility. If any of these components are missing, you will likely encounter errors during installation or when attempting to connect to a vehicle.
We strongly recommend downloading SDD onto a dedicated workshop laptop rather than a personal machine. The software requires specific Java versions and network settings that can conflict with everyday applications. A clean Windows environment minimises these conflicts and ensures reliable performance when you are working on customer vehicles.
System Prerequisites and Hardware Requirements
Before running the installer, verify that your laptop meets the minimum hardware and software requirements. SDD is a legacy application that was originally designed for Windows 7, though it can run on Windows 10 with some compatibility adjustments. It will not run on Windows 11 or macOS without virtualisation, which adds significant complexity.
| Component | Minimum Requirement | Recommended Specification |
|---|---|---|
| Operating System | Windows 7 SP1 (64-bit) | Windows 10 Pro (64-bit) |
| Processor | Intel Core i3 or equivalent | Intel Core i5 or i7 (6th gen or newer) |
| RAM | 4 GB | 8 GB or more |
| Storage | 20 GB free space | 50 GB SSD free space |
| Display | 1366 x 768 resolution | 1920 x 1080 resolution |
| USB Ports | 1x USB 2.0 | 2x USB 3.0 ports |
| Network | Offline capability | Ethernet or WiFi for updates |
Many professional technicians choose a Panasonic Toughbook CF-53 or CF-54 for their SDD installation. These rugged laptops are built to withstand workshop environments, feature multiple USB ports, and have excellent compatibility with automotive diagnostic software. The CF-54 in particular is widely regarded as the industry standard for JLR diagnostics because it combines durability with ample performance for both SDD and Pathfinder.
Another critical prerequisite is ensuring your Windows installation is fully updated and free from malware. Run Windows Update until no further updates are available, and disable any aggressive antivirus software temporarily during installation. Some antivirus products incorrectly flag SDD components or Java executables as threats, which can corrupt the installation mid-process.
Preparing Your Windows Environment
SDD relies on several Microsoft runtime libraries and a specific version of Java. Before launching the SDD installer, you must install these dependencies in the correct order. Skipping this step is one of the most common causes of installation failure.
First, install the Java Runtime Environment (JRE) version 8, update 251 or later. SDD is built on Java and will not function with newer Java versions such as Java 11 or Java 17. Download JRE 8 from the Oracle archive or use the bundled Java installer included in your SDD package. During Java installation, ensure you select the option to set JAVA_HOME environment variables, as SDD's launcher scripts depend on this path.
Next, install the Microsoft Visual C++ Redistributable packages for Visual Studio 2010, 2012, 2013, and 2015-2019. These are required by various SDD components and drivers. You can install all versions side by side without conflict. If you are running Windows 10, many of these are already present, but it is worth verifying through the Programs and Features control panel.
Third, enable .NET Framework 3.5 if it is not already active. Windows 10 and 11 often disable legacy .NET versions by default. Navigate to Control Panel > Programs > Turn Windows Features On or Off, then tick the box for .NET Framework 3.5. Windows will download and install the necessary files.
Finally, create a system restore point. If anything goes wrong during SDD installation, you can revert to this restore point rather than reinstalling Windows from scratch. This simple precaution can save hours of troubleshooting.
Running the SDD Installer
With your environment prepared, you are ready to run the SDD installer. Right-click the installer executable and select "Run as Administrator." This is non-negotiable: SDD installs drivers, registry entries, and system services that require elevated privileges. Running as a standard user will almost certainly fail.
The installation wizard will prompt you for an installation directory. We strongly recommend accepting the default path, which is typically C:\Program Files\JLR\SDD. Installing to custom paths with spaces or special characters can cause path resolution errors in Java scripts. If you must use a custom location, choose a simple path such as C:\JLR\SDD with no spaces.
During installation, the wizard will copy the main application files, extract calibration libraries, and register COM components. This process can take 15 to 45 minutes depending on your storage speed. Do not interrupt the installer, and ensure your laptop is connected to mains power. If the installer appears to hang at the "Registering Components" stage, be patient: this step often takes 10 minutes or more on mechanical hard drives.
Once the main installation completes, you will be prompted to install the NGI calibration files. These are essential for working with infotainment modules on vehicles equipped with the New Generation Infotainment system. Select "Yes" and allow the calibration installer to run. The NGI pack is large (often 8-12 GB), so this step may take an additional 20-30 minutes.
J2534 Driver Installation
After SDD itself is installed, you must install the drivers for your Vehicle Communication Interface (VCI). SDD communicates with JLR vehicles through a J2534-compatible Pass-Thru device, the most common being the Jaguar Landrover VCI interface for SDD. Without correctly installed drivers, SDD will not detect your VCI and you will see "No VCI Found" errors when attempting to connect.
Connect your VCI to a USB port and allow Windows to attempt automatic driver installation. In most cases, Windows will fail to find the correct driver automatically, which is expected. Open Device Manager, locate the unknown device (usually under "Other Devices" with a yellow warning triangle), right-click, and select "Update Driver." Choose "Browse my computer for drivers" and navigate to the driver folder included in your SDD package or downloaded from the VCI manufacturer's website.
For the Mongoose JLR cable, install the Drew Technologies driver package. After installation, the device should appear in Device Manager under "Universal Serial Bus Devices" or "Ports (COM & LPT)" as "Mongoose JLR" or similar. Make a note of the COM port number assigned, as some diagnostic utilities require this information.
We recommend testing the driver by running the VCI manufacturer's test utility before launching SDD. The Mongoose cable includes a simple test application that verifies USB connectivity and firmware status. If this test passes, your driver installation is correct. If it fails, uninstall the driver, disconnect the cable, reboot your laptop, and repeat the installation process.
Licence Activation
Licence activation is the stage where many first-time users encounter difficulties. SDD licences are typically tied to a specific hardware ID or a USB dongle. The exact activation method depends on how you purchased the software. At SX-CAN, we provide clear activation instructions with every JLR SDD Jaguar Land Rover Diagnostic, and our support team is available to assist if you encounter issues.
If your licence uses hardware ID binding, launch the SDD Licence Manager utility before opening the main application. This utility reads your laptop's hardware fingerprint (based on CPU, motherboard, and disk serial numbers) and generates a request code. Email this request code to your supplier, who will return an activation key. Enter the key in the Licence Manager and click "Activate." You must be connected to the internet for online activation to succeed.
If your licence uses a USB dongle, insert the dongle before launching SDD. Windows should detect the dongle automatically and install the necessary drivers. The dongle must remain inserted for the entire duration of your SDD session. Removing the dongle mid-session will cause SDD to deactivate and may result in lost programming data.
Some older SDD versions use a licence file (.lic) that must be copied to a specific directory, typically C:\ProgramData\JLR\SDD\Licence. If your supplier provided a .lic file, copy it to this location and restart SDD. If the directory does not exist, create it manually.
J2534 VCI Selection in SDD
With SDD installed, activated, and your VCI drivers in place, you must configure SDD to use the correct communication interface. Launch SDD and navigate to the Settings or Configuration menu. Look for the "VCI Selection" or "Interface" option.
From the dropdown list, select "J2534 Pass-Thru" or the specific name of your device (e.g., "Mongoose JLR"). Do not select "JLR VCI" unless you are using the original JLR dealer interface, which is rare in independent workshops. If your device does not appear in the list, close SDD, verify the driver installation in Device Manager, and reconnect the VCI.
Set the communication protocol to "CAN" for most vehicles covered by SDD. Some older models may use K-Line or ISO protocols, but these are increasingly uncommon. The default CAN settings (500 kbps, 11-bit identifiers) are correct for the vast majority of JLR vehicles from 2005-2016.
Save your settings and exit the configuration menu. SDD will now remember these preferences for future sessions. If you switch between multiple VCI devices, you will need to return to this menu and select the appropriate device each time.
First Launch and Initial Verification
Launch SDD from the desktop shortcut or Start Menu. The first launch may take longer than usual as SDD initialises its internal databases and verifies calibration file integrity. You should see the JLR splash screen, followed by the main application window.
Before connecting to a vehicle, run the internal self-test. This is usually found under Help > Diagnostics or Tools > Self Test. The test verifies that all SDD modules are loading correctly, that the calibration database is accessible, and that the licence is valid. If any test fails, note the error code and consult the troubleshooting section below.
Connect your VCI to the vehicle's OBD-II port (located under the dashboard on the driver's side) and to your laptop via USB. Turn the vehicle ignition to position II ( ignition on, engine off). In SDD, click "Read Vehicle Information" or "Identify Vehicle." If everything is configured correctly, SDD will detect the VCI, read the VIN automatically, and display the vehicle profile.
Successful vehicle identification confirms that your entire installation chain is working: Windows, Java, SDD application, VCI drivers, USB connectivity, and vehicle communication. This is the moment when most technicians breathe a sigh of relief. If identification fails, proceed to the troubleshooting section.
Common Errors and How to Fix Them
Even with careful preparation, errors can occur. Below are the most common issues we see and their proven solutions.
Error: "Java Virtual Machine Launcher: Could not find the main class"
This indicates that Java is either not installed or the JAVA_HOME environment variable is incorrect. Verify that JRE 8 is installed and that the PATH variable includes the Java bin directory. Reinstall Java if necessary, selecting the option to update environment variables.
Error: "No VCI Detected" or "VCI Not Found"
This is almost always a driver issue. Open Device Manager and look for unknown devices. Reinstall the driver manually, ensuring you select the correct 32-bit or 64-bit version for your Windows architecture. Try a different USB port, preferably USB 2.0 rather than USB 3.0, as some older VCI devices have compatibility issues with USB 3.0 controllers.
Error: "Licence Invalid" or "Licence Expired"
Verify that your activation key was entered correctly, with no extra spaces or characters. If using a hardware-bound licence, check that your laptop has not had significant hardware changes (new motherboard, disk replacement) since activation. Contact your supplier for a reactivation if hardware has changed.
Error: "Calibration Files Missing"
This occurs when the NGI calibration pack was not installed or was installed to an incorrect directory. Re-run the NGI installer and verify the destination path matches your SDD installation directory. You may need to manually copy calibration files from the installer package to C:\ProgramData\JLR\SDD\Calibrations.
Error: SDD Crashes on Vehicle Connection
This is often caused by antivirus software interfering with the USB communication layer. Temporarily disable your antivirus and add the entire SDD installation directory to the antivirus exclusion list. Also ensure Windows Power Management is not turning off the USB root hub to save power. Disable USB selective suspend in Power Options.
Final Verification and Best Practices
Once you have successfully identified a vehicle, perform a complete diagnostic cycle to fully verify your installation. Navigate to the symptom-driven diagnostic tree, select a common symptom such as "Engine Management Light On," and allow SDD to guide you through the recommended tests. This exercises the full communication path between SDD, your VCI, and every module on the vehicle network.
Record your successful configuration for future reference. Note your Windows version, Java version, VCI model, driver version, and SDD version. If you ever need to reinstall or migrate to a new laptop, this information will save significant time.
Keep your SDD installation offline from general internet use. The legacy Java version required by SDD has known security vulnerabilities that are not a concern for an isolated workshop laptop but could be problematic on a machine used for browsing and email. If you need internet access for licence activation or TOPIX Cloud, use a dedicated WiFi connection that you can disable when not needed.
Finally, consider creating a full disk image of your working SDD laptop using software such as Macrium Reflect or Acronis True Image. If your hard drive fails or Windows becomes corrupted, you can restore from this image in minutes rather than spending hours reinstalling everything from scratch. Many professional JLR technicians keep a backup image on an external USB drive for exactly this reason.